In a few steps we will explain how to use your own image as a background in your photobook and add some effects to it.
Step 1: Drag the image you want to place as a background to the edge of the page on the workspace and drop it there. You will see (before you let go of the mouse button) that the page is greyed (img. bg-8) out with the wording ("right side background", "left side background" or "whole page background").
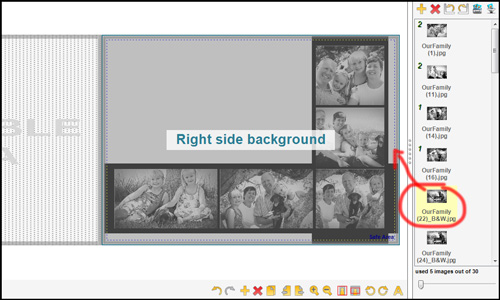 |
| bg-8 |
This is all you need to do to add a picture to your background, but just to make it a little more interesting we're going to explain how to add some effects to your background.
Step 2: Add opacity to your background image. Right click on your background and choose "Set Opacity" (img. bg-9).
Now play with the slider to make your image more and less opaque (img. bg-10).
 |
| bg-10 |
 |
| bg-9 |
Step 3: Click on the "Color" button (img. bg-11a) to change the colour overlay of your image. For this image we chose a cyan colour. (img. bg-11b)
 |
| bg-11a |
 |
| bg-11b |
Step 3 (alternative): Alternatively you can apply a colour effect to your background. Simply drag the desired effect onto your background image (img. bg-12). We used the "Copper" colour effect for this illustration.
 |
| bg-12 |


Comments
Post a Comment